Missing Documentation for Building Databox Connector
In our previous article we explained how you can
build Databox Connector for Magento 2. During the process we found that at some places the official Databox documentation is old, missing or confusing. So, we decided to share the missing parts in the Databox documentation to help other fellow developers. So, we are providing you instructions & tips for doing many important things in Databox connector, which is not mentioned anywhere in the official Databox documentation.
Adding validation in Connector activation form
Validation in activation form can be applied using Regular expressions. For example below code snippet uses Regex to validate if user has enetered a URL and it is provided in parameters of Auth section.
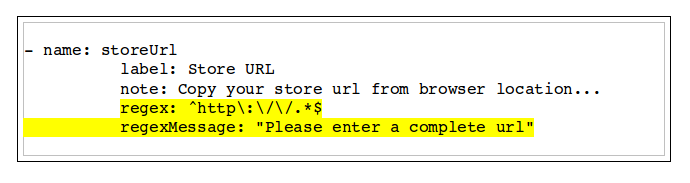
You can mention Regular expression in Regex parameter and the error in case Regex is not validated in regexMessage.
Accepting variables from Connector activation form
You can access data from fields in activation form in API and other section of manifest using {name_of_field} as below.
In parameters of Auth section :

In API section :
 Adding Currency for Metrics
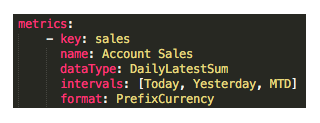
To push currency values, you can simply add "unit" field that will apply to all the metrics in individual push item like this below:
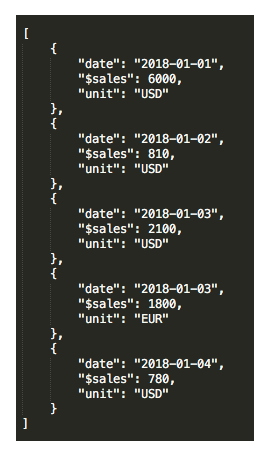
You can also add units to attributes. Please check the example given below. You have to use correct currency acronyms to properly display them on blocks, for example USD, EUR. Currency also have specific format ("PrefixCurrency") that you need to specify in the manifest metrics section.
 Passing variables from settings in Transformation Logic to Manifest
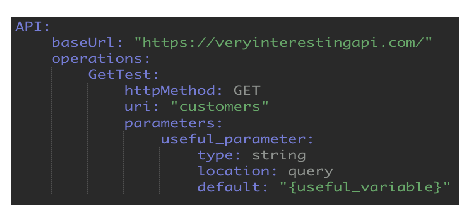
After you save variable to settings, you can use it as API parameter in the manifest. Let's say I need 'useful_variable', so I will save it to settings:
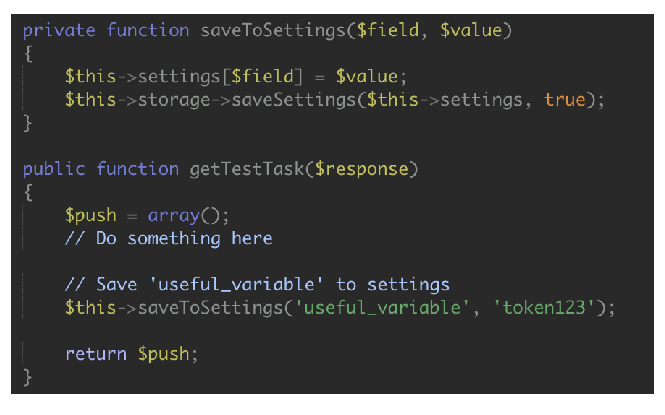
Now you can use it in API requests like the way you would use variables from connection form.
 Using UserSelect Section
UserSelect section can be used to ask user to select from some options coming from another task defined in our manifest during connector activation. UserSelect should be something like this below format :
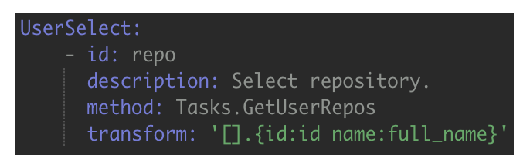
Above example is using GetUserRepos task to list all possible GitHub repositories. This task is also paging through pages but it is not required if you can get all selections/items with one API request. The task details are as shown below :
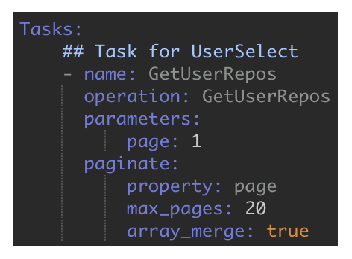
The only thing you need to know is the format response correctly that you want to display with UserSelect. All items must have "id" and "name" field set. When user selects one option, it is stored in data source settings for you to use it afterwards. The response of the task should be something like following format :
Once all of the above steps are complete, you should get a popup like below after successful authorization :
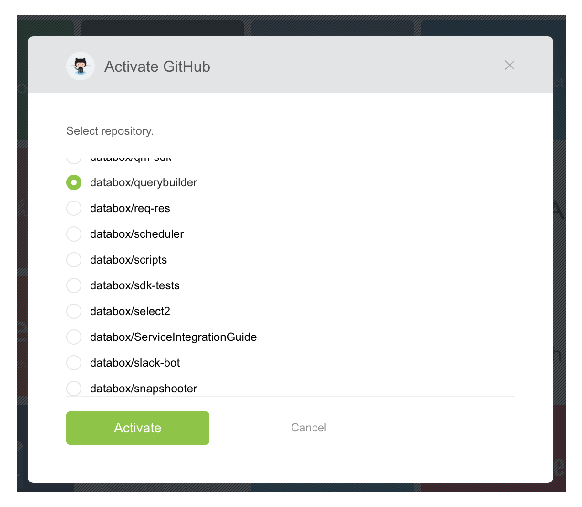
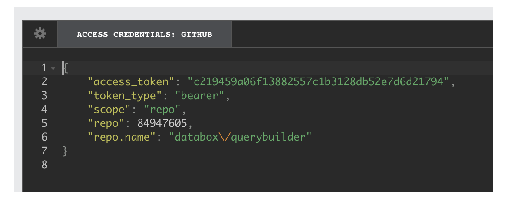
The response from user is stored in settings as your_task_id.name as shown below :
Thats all for Databox missing documentation. As we will explore the platform more, we will keep you updated. Please feel free to
contact us if you need any help in Magento or Databox.